
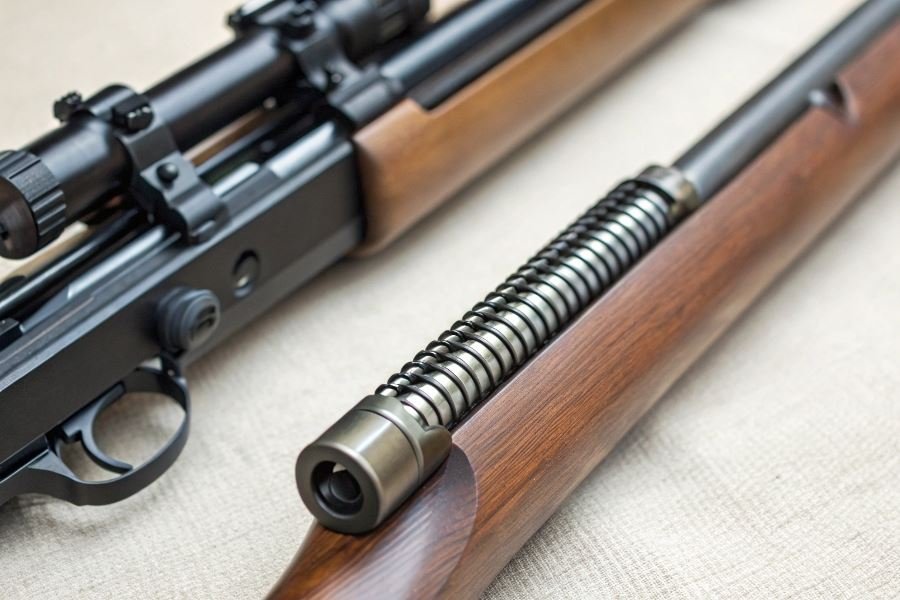
Ever missed a target by mere millimeters and felt that gut-wrenching disappointment? That’s the difference proper sighting makes. Whether you’re preparing for competition or simply honing your skills, the journey to precision shooting begins long before you pull the trigger.
Sighting in a pneumatic rifle isn’t just a preliminary step—it’s the foundation of every successful shot you’ll ever take. Think of it as calibrating your favorite instrument; without this crucial adjustment, even the most expensive rifle becomes little more than an unwieldy paperweight.
The precision toolkit
Before diving into the adjustment process, familiarize yourself with the essential equipment:
- Front sight: Typically a post or bead at the muzzle end
- Rear sight: Usually adjustable for windage (left/right) and elevation (up/down)
- Scope: Offers magnification and precision crosshairs for enhanced accuracy
- Sight adjustment tools: Often small Allen wrenches or specialized screwdrivers
Modern pneumatic rifles typically feature either open sights (iron sights) or mounting rails for optical sights. The terminology might seem technical at first—terms like minute of angle (MOA) and click value—but these concepts will become second nature as you practice.
Safety first, accuracy second
Before touching a single adjustment screw, remember that safety trumps precision every time. Always:
- Ensure your rifle is unloaded before handling
- Point the muzzle in a safe direction
- Wear appropriate eye protection
- Establish a proper backstop that can safely stop pellets
- Verify your shooting area is legal and clear of bystanders
The discipline you bring to these safety protocols directly translates to the discipline required for precision shooting. After all, the steadiest hands belong to those with the clearest minds—free from worry about potential accidents.
Dialing In Your Pneumatic Rifle for Perfect Accuracy
Finding Your Stable Foundation
The journey to pinpoint accuracy begins with stability. Set up your shooting position like you’re building a fortress of precision. A solid shooting bench or sandbags will eliminate the micro-movements that send pellets off course. Your target setup matters just as much—use proper target paper with clear measurement grids at a precisely measured distance, typically starting at 10 yards for initial sighting.
Learning how to properly sight in a pneumatic rifle transforms an inaccurate air gun into a precision instrument. The process requires patience and methodical adjustments, but the satisfaction of hitting exactly where you aim makes every minute worthwhile. Many shooters rush this critical process, then wonder why their shots scatter unpredictably downrange.
Pro tip: Use a shooting rest like the Caldwell Lead Sled to eliminate human variables during the sighting process. Your body naturally sways and moves, even when you think you’re perfectly still.
Initial Alignment: Getting Close Before Getting Perfect
Before making fine adjustments, you need to get in the ballpark. Bore sighting—aligning your scope roughly with your barrel’s axis—saves time and ammunition. For break-barrel pneumatics, this means looking through the barrel (after ensuring the rifle is unloaded) at your target, then adjusting your scope until it’s pointing at approximately the same spot.
For fixed-barrel models, a laser bore sighter can be invaluable, providing a visual reference point without firing a single pellet.
Making Precision Adjustments
| Adjustment Type | What It Controls | Direction Rule |
|---|---|---|
| Windage | Left-right impact | Move adjustment in direction you want impact to move |
| Elevation | Up-down impact | Move adjustment in direction you want impact to move |
Start with three-shot groups rather than single shots. This gives you a pattern to work with rather than potentially misleading single impacts. After each group, make deliberate, measured adjustments:
- Note where your group centers compared to your aim point
- Adjust windage (left/right) first in small increments
- Follow with elevation (up/down) adjustments
- Fire another group and measure the change
- Repeat until your group centers on your aim point
Remember: Most scopes adjust in “minutes of angle” (MOA), typically 1/4 MOA per click. At 25 yards, each click moves your impact point approximately 1/16 inch.
Confirming Zero at Multiple Distances
A pneumatic rifle that’s perfectly zeroed at 10 yards may be significantly off at 30 yards due to pellet trajectory. After achieving your primary zero (typically 25-30 yards for most air rifles), test your rifle at various distances:
- Close range (10 yards): Note the holdover required
- Mid-range (25 yards): Should be dead-on if that’s your zero
- Extended range (40+ yards): Document the drop
Create a “ballistic chart” for your specific rifle/pellet combination. Different pellet weights and shapes will produce different trajectories, even in the same rifle.
The final confirmation should involve shooting from your typical field positions—standing, kneeling, or sitting—rather than just from a bench. Your real-world accuracy matters more than perfect bench results.
With these methodical steps, your pneumatic rifle will transform from merely pointing in the general direction to delivering pellets exactly where you aim, shot after shot.
Mastering Advanced Pneumatic Rifle Sighting Techniques
Conquering environmental factors
When you’ve nailed the basics of sighting in your pneumatic rifle, it’s time to level up. Environmental factors can make or break your accuracy, even with perfect form. Wind is your primary nemesis – a 10 mph crosswind can shift your pellet several inches at 50 yards!
Temperature affects both your rifle and ammunition performance. In colder weather, compressed air delivers less energy, potentially dropping your point of impact. Hot days can increase pressure, raising your impact point. Professional shooters keep detailed logbooks tracking temperature effects on their specific setups.
Altitude changes air density dramatically. Moving from sea level to 5,000 feet elevation can shift your zero by 1-2 MOA (Minute of Angle). If you’re traveling to competitions or hunting in varied terrain, create a reference chart for your specific rifle showing elevation adjustments.
Humidity plays a subtle role too. While less impactful than other factors, extremely dry or humid conditions can alter pellet trajectory by affecting air density. The difference might be minimal at short ranges but becomes significant beyond 40 yards.
The truly elite shooters don’t fight environmental factors – they embrace and account for them systematically.
Ammunition matters more than you think
Different pellet weights and designs interact uniquely with your rifle’s barrel and power plant. Lighter pellets (7-8 grains) typically shoot flatter but are more susceptible to wind drift. Heavier options (10+ grains) buck the wind better but require more holdover at distance.
Pellet head design dramatically impacts accuracy. Consider these common types:
| Pellet Type | Best Use Case | Typical Accuracy |
|---|---|---|
| Wadcutter | Target shooting | Excellent under 30yds |
| Domed | All-purpose/hunting | Very good at all ranges |
| Hollow Point | Hunting | Good, with expansion |
| Pointed | Long range | Variable, rifle-dependent |
The material matters too. Lead pellets remain the gold standard for accuracy, but alloy options from JSB or H&N offer higher velocities with different ballistic properties. Test multiple premium brands to discover what your specific rifle prefers – the difference can be striking.
Batch testing is crucial. Even within the same brand and type, different production batches can perform differently. When you find “the one” that groups tightly, consider stocking up from that same batch for consistency.
Maintaining your perfect zero
All that work dialing in your rifle deserves protection. Vibration is the silent killer of sight settings. Every shot creates micro-vibrations that can gradually loosen screws and shift adjustments. Apply a tiny drop of non-permanent Loctite 242 (blue) to critical mounting screws after achieving your perfect zero.
Regular verification is non-negotiable. Even with perfect maintenance, check your zero every 500 shots or before any important shooting session. Environmental changes, subtle wear patterns, and even storage conditions can affect your settings over time.
Digital tools have revolutionized long-term maintenance. Ballistic apps like Strelok Pro allow you to save multiple rifle profiles with detailed notes on zero settings for different conditions and ammunition types.
For competition shooters, consider creating a “cold bore” chart. Your first shot of the day often impacts differently than subsequent shots as the rifle warms up. Document this pattern to compensate during those crucial first competition shots.
Remember that pneumatic rifles, especially PCPs (Pre-Charged Pneumatics), perform differently across their pressure curve. Re-verify your zero at various pressure levels to understand how your point of impact shifts throughout your usable pressure range.