
Ever watched a boxing match and thought, “I could build that”? Whether you’re training for competition, coaching the next champion, or creating a home gym that packs a punch, setting up your own boxing ring is a game-changer for serious enthusiasts. The good news? You don’t need a professional crew to make it happen.
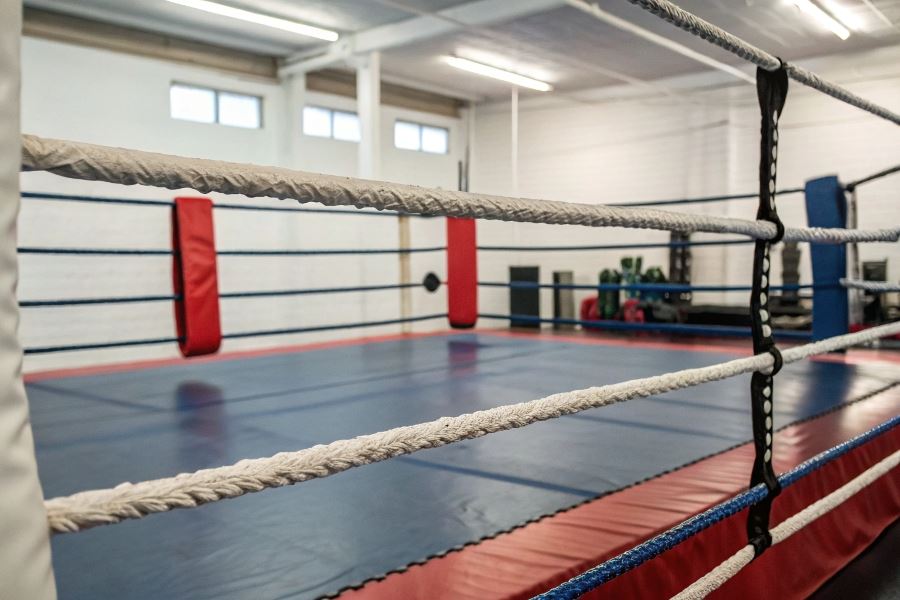
A standard boxing ring isn’t just four ropes and a canvas—it’s an engineered training environment designed for both performance and protection. Professional rings typically feature a 16-20 foot square platform elevated 3-4 feet off the ground, surrounded by 4 ropes attached to corner posts. The floor consists of canvas stretched over padding and a plywood base. Understanding these components is your first step toward a successful DIY project.
Safety first, champions second. Before grabbing your tools, remember that a poorly constructed ring can lead to serious injuries. Ensure your building location can support the ring’s weight (approximately 2,000-3,000 pounds), check local building codes, and plan for proper clearance around all sides.
Your toolkit for this project should include:
- Heavy-duty wrenches and screwdrivers
- Power drill with various bits
- Measuring tape and level
- Rubber mallet
- Turnbuckles for rope tension
- Heavy-duty staple gun
Pro tip: Create a detailed inventory checklist before starting. Nothing halts progress faster than discovering you’re missing critical hardware halfway through assembly.
The foundation of any great boxer is footwork—and the foundation of any great ring is careful preparation. With the right components, safety mindset, and tools at hand, you’re ready to build a training space worthy of champions.
Building Your Boxing Battleground
Ready to transform your garage or basement into a legitimate boxing arena? Setting up a boxing ring by yourself might seem daunting, but with the right approach, you’ll have your personal fight venue ready for action in no time. The satisfaction of lacing up your gloves and stepping into a ring you built with your own hands is unmatched—let’s make it happen.
Laying the Foundation
The foundation is literally what everything else stands on, so getting it right is crucial. When tackling how to set up a boxing ring by yourself, always start with proper floor preparation.
First, measure your available space. A regulation amateur ring is 16×16 feet inside the ropes, but you can scale down to 12×12 feet for home use. Add 2 feet on each side for the apron, and you’ll know your total footprint.
For padding, you’ll need:
- High-density foam mats (minimum 1.5 inches thick)
- Plywood sheets (optional but recommended for stability)
- Heavy-duty tape or interlocking mechanisms
Pro tip: Use EVA foam puzzle mats like those from Zebra Athletics for easy installation and excellent shock absorption. Layer them at least two deep for proper protection.
Ensure your foundation is level before proceeding. Even a slight tilt can affect balance during training and potentially lead to injuries.
Raising the Posts and Stringing the Ropes
With your foundation set, it’s time for the vertical elements that define your ring.
Post Installation
- Position your four corner posts (typically steel, 3-4 inches in diameter)
- Secure each post to a base plate (minimum 24×24 inches)
- Anchor the base plates to the floor using appropriate hardware
Your posts should extend 5 feet above the platform. Most home setups use posts from manufacturers like Ringside or Title Boxing, which come with pre-drilled holes for rope installation.
Rope Configuration
Traditional rings use four ropes positioned at these heights:
- Bottom rope: 18 inches from canvas
- Second rope: 30 inches
- Third rope: 42 inches
- Top rope: 54 inches
Remember: Proper tension is everything. Too loose, and fighters could fall through; too tight, and the ropes won’t provide necessary give during contact.
Thread your ropes (1-inch diameter is standard) through the posts, using turnbuckles at one corner to achieve perfect tension. Wrap each rope section with protective padding, typically secured with Velcro for easy replacement.
Canvas Installation and Final Securing
The canvas is where the magic happens—the battlefield where every footwork pattern and punch will play out.
Start with a heavy-duty canvas material (at least 12-ounce duck canvas). Cut it to size with a 2-foot overhang on all sides. Stretch it tightly over your padded foundation and secure it to the platform using:
- Industrial staples around the perimeter
- Reinforced grommets and lacing for added security
- Corner padding at each post (extending at least 5 feet high)
Critical safety check: Walk the entire surface, feeling for any uneven spots or excessive give. Address these immediately before use.
| Component | Recommended Material | Approximate Cost |
|---|---|---|
| Floor Padding | EVA Foam, 1.5-2″ thick | $300-500 |
| Posts | Steel, 3-4″ diameter | $400-600 |
| Ropes | Synthetic or natural, 1″ diameter | $200-300 |
| Canvas | 12-16 oz duck canvas | $150-250 |
| Hardware | Turnbuckles, brackets, etc. | $100-200 |
Once everything is secured, perform a thorough safety inspection. Test rope tension, canvas tautness, and post stability before throwing your first punch.
Your DIY boxing ring isn’t just equipment—it’s a commitment to your training and a statement about your dedication to the sweet science. Now lace up and enjoy the fruits of your labor!
Keep Your Ring Fighting Fit
Setting up your boxing ring is just the beginning of your journey. Like any serious piece of equipment, a boxing ring demands regular attention to stay in peak condition. Let’s dive into the maintenance routines that will keep your ring ready for action, troubleshoot common issues, and identify when it’s time to call in the pros.
Inspection and Maintenance Essentials
The longevity of your boxing ring depends on consistent care. Establish a weekly inspection routine that includes:
Canvas check: Examine for tears, fraying, or excessive wear. Wipe down with a mild disinfectant after heavy use to prevent bacterial growth and odors.
Rope tension test: Proper tension is crucial for safety. Test by pressing firmly against each rope – they should give slightly but remain taut. Adjust turnbuckles as needed to maintain consistent tension.
Monthly maintenance goes deeper: Remove the canvas (if possible) to inspect the platform underneath. Check for warped boards, protruding nails, or compromised support structures.
The most common ring failure point isn’t the obvious components, but the connection points where different elements meet. Pay special attention to corners and joints.
For rings with padding, inspect for compression or breakdown every three months. Record your maintenance in a simple log:
| Component | Inspection Frequency | What to Look For | Action Needed |
|---|---|---|---|
| Canvas | Weekly | Tears, stains, stretching | Clean, patch, replace if necessary |
| Ropes | Weekly | Tension, fraying, secure connections | Adjust turnbuckles, replace worn sections |
| Turnbuckles | Monthly | Rust, thread integrity, secure attachment | Lubricate, tighten, replace if stripped |
| Platform | Monthly | Stability, evenness, structural integrity | Reinforce supports, replace damaged boards |
| Padding | Quarterly | Compression, tears, secure attachment | Refluff, repair covering, replace sections |
Troubleshooting Ring Issues
Even with regular maintenance, problems can develop. Here’s how to address the most common issues:
Sagging canvas: This creates dangerous footing for fighters. Tighten the lacing system evenly from the center outward. If lacing has stretched, replace it with new, high-quality Ringside lacing material.
Loose ropes: Beyond adjusting turnbuckles, check that rope clamps haven’t slipped. Sometimes the rope itself stretches over time – mark the position before removing to measure the difference, then replace if stretched beyond 2-3%.
Unstable corners: The corner posts take tremendous pressure. If wobbling occurs, first check the base plates and bolts. Tighten all connections and consider adding additional bracing if the problem persists.
Platform creaking or flexing: This indicates potential structural weakness. Identify the exact location by having someone walk across while you observe from below. Reinforce with additional supports or replace compromised sections.
Quick fix for minor canvas tears: Apply Tear-Aid Type A patches to both sides of small tears as a temporary solution until proper repair or replacement.
When to Call the Professionals
While DIY maintenance can address many issues, certain situations demand expert intervention:
Structural integrity concerns: If you notice significant platform movement, cracking sounds, or visible warping that can’t be easily fixed, stop using the ring immediately and consult a professional.
Major canvas replacement: While patching works for small issues, a full canvas replacement requires precise tensioning that professionals can best provide.
Electrical problems: For rings with integrated lighting or electronic components, always defer to licensed electricians for safety.
Post-flooding assessment: If your ring has been exposed to flooding, professional evaluation is essential to identify hidden damage and potential mold issues.
Remember that investing in professional help when truly needed is far less expensive than dealing with injuries caused by a compromised ring. Your boxing ring is both a training tool and a safety system – maintain it accordingly.